Jenkins and Objective-C setup for beginners
Table of contents
In the following tutorial I will describe how Jenkins server works and how it can be used to build objective-C projects. So, our focus will be on setting and installing Jenkins server as continuous integration server on MAC OS X platform and on configuring Jenkins to build objective-C (XCODE) projects. Entire tutorial will be divided in three chapters:
- Jenkins prerequisites and installation,
- Jenkins service account setup and certificates and
- Configuration of Jenkins build jobs and security.
But first, let me just say a few words about what Jenkins actually is. Jenkins is a continuous integration tool written in Java. It's open source and cross platform, which means that it can be used on any operating system platform. It supports pretty much all popular version control tools as 'CVS', 'Subversion', 'Git', 'Mercurial' etc. Also, it has extendable architecture (plugin support). There are numerous plugins written for Jenkins server which can be used to extend base-line functionality and support, also if developer wants he/she can build a new custom plugin which can be included in Jenkins later.
Main entity in Jenkins foundations is build job. Build job is a single instruction file, configured by the user, which tells to the Jenkins how to perform single build. Interface for configuration of build jobs is intuitive and user friendly. It's very easy to append or modify a build job, or even change order of build steps.
Chapter 1. Jenkins prerequisites and installation
In this chapter we will go to through the steps which will install Jenkins server on MAC OS X platform. We are assuming that you have access to the at least one administrative account on your MAC platform. So, log on to your MAC platform with an administrative account. In this tutorial we will use Vega administrative account as an example.
Step 1. Because we are planning to build XCODE projects with Jenkins, XCODE development environment is a mandatory requirement. Therefore, install XCODE development environment on your platform. If XCODE is already installed, please check whether the current user has appropriate rights to start and use XCODE and its tools. If you are uncertain if you have full rights or not, please uninstall previous version of XCODE and do installation of new one. New, fresh copy of XCODE can be downloaded from 'Apple developers' location: https://developer.apple.com/downloads/index.action.
Step 2. Install Command Line Tools for XCODE. If you are planning to use subversion control for code management, XCODE tools pack will install all necessary files to have that version control. XCODE tools can be downloaded from location: https://developer.apple.com/downloads/index.action
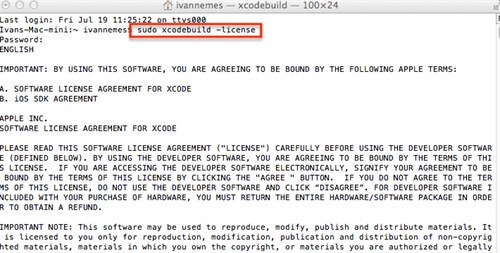
Step 3. Accept XCODE license agreement. Open terminal application and run the following command:
sudo xcodebuild -license
This command will populate license agreement as super user. See picture bellow. At the bottom of the license agreement screen you will be asked to choose an action regarding license confirmation. By typing 'agree'wordyou will confirm that you agree with license agreement.
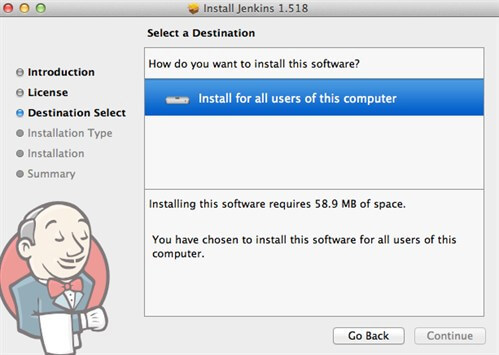
Step 4. Download Jenkins installation package from location: http://jenkins-ci.org/ and perform installation. Installation wizard is shown on picture bellow. We are suggesting installation by leaving all settings as default.
When installer completes its job, JENKINS server should be available on port 8080 by default, and it's usable. You can access the server through the following address: localhost:8080.
Step 5. Now because we are planning to build objective-C projects, we will have to install XCODE plugin for Jenkins.To install plugin directly from JENKINS go to the main menu (marked on the picture bellow in upper left corner), then go to the Manage Jenkins menu item and finally click on Manage Plugins option. All available plugins are shown on tab 'Available'. If this tab is showing nothing, go to the 'Advanced'tab and press Check Now button at the bottom of the screen. Then go back to Available tab and locate XCODE plugin.
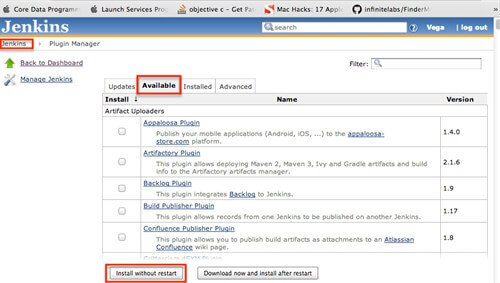
You can choose to install plugin with or without restart of the server. Also, if you want to manually install XCODE plugin, you can find plugin on location: http://rayh.com.au/xcode-hudson-plugin.
Next: Chapter 2. Jenkins service account setup and certificates